One of my favorite Daydream Believers dress styles, “The Blair” is back for fall!
"The Blair" is a fun, very versatile style; featuring extra-long straps that tie in the
back for a totally adjustable fit!

A peek into the studio…
7.27.2011
I am a busy bee today, sewing non stop for the relaunch of
The Daydream Believer Shop at Etsy
Thankfully, I have the cutest lil’ shop assistants in town helping me out!
I am SO excited about the new pieces I am working on for Fall. The dresses, skirts, and tops are all classic, vintage inspired styles made from fun, modern fabrics.
The color scheme for the collection is goldenrod/coffee brown/cranberry with touches of honeysuckle pink. The pieces will feature lots of ruffle accents made from tea-dyed muslin and sweet crochet lace trims. I am really excited about it! :)
Here’s a peek at one of my “fabric boards”
Preview pics of the actual pieces coming SOON! :)
Crafty Mumma Show & Tell
7.25.2011
Happy Monday! :) How was your weekend? Ours was pretty crazy! We knew it was going to be a busy one, graduation party, bridal shower, volunteering at a community clean up project, sewing time, a family dinner… just a normal busy weekend.
We did not anticipate a random plumbing problem destroying our bathroom.
There was water everywhere.
Floors ruined.
Moulding ruined.
Bath toys, towels, and our spare tp stash, ruined.
So NOT Cool!
Once the plumbing issue was fixed, Hubs and I (with both girls) found ourselves navigating our way through Lowes late on Saturday night deciding on new floors. We decided that night, that since we had to change the floors, we might as well change the paint, and the trim, and the vanity mirror…you can see where this is going! So our weekend plans quickly changed; the bridal shower was missed, the family dinner postponed, and no sewing was done. As I write this, our bathroom is completely torn apart and receiving a full makeover (which, I admit, is kinda fun… I just wish it wasn’t inspired by the great flash-flood of 2011) ;) Oh well, what can you do?
I had hoped to have some Fall 2011 previews to show you, but alas, no photos were edited this weekend either (sorry ya’ll!) - But, here’s a peek at some of the projects that have left my studio recently! :)
These chic banners were ordered for a Wedding Shower-
The black and white glitter is my favorite :)
This sweet cowboy bunting is headed to Texas for a birthday celebration-

I do believe my favorite custom this month was Ella's Birthday Outfit :) SO fun!
This sweet headband was crafted for a recent grad :)
I used it to embellish her wrapped gift in place of a bow. She loved it! :)
I love this sweet little .25 cent dress I made for Miss V*
One too-small onesie {purchased for a quarter from a mom-2-mom sale}
+ some rad black and white fabric {gifted to me from a friend}
= one adorable little playdress!
Can't beat a .25 cent dress! :)
My crafty-to-do-list is SO full! We hope to have our little remodeling project done today so I can be back to sewing for Fall, tomorrow! Yea! :)
SO, what have you been working on?
We did not anticipate a random plumbing problem destroying our bathroom.
There was water everywhere.
Floors ruined.
Moulding ruined.
Bath toys, towels, and our spare tp stash, ruined.
So NOT Cool!
Once the plumbing issue was fixed, Hubs and I (with both girls) found ourselves navigating our way through Lowes late on Saturday night deciding on new floors. We decided that night, that since we had to change the floors, we might as well change the paint, and the trim, and the vanity mirror…you can see where this is going! So our weekend plans quickly changed; the bridal shower was missed, the family dinner postponed, and no sewing was done. As I write this, our bathroom is completely torn apart and receiving a full makeover (which, I admit, is kinda fun… I just wish it wasn’t inspired by the great flash-flood of 2011) ;) Oh well, what can you do?
I had hoped to have some Fall 2011 previews to show you, but alas, no photos were edited this weekend either (sorry ya’ll!) - But, here’s a peek at some of the projects that have left my studio recently! :)
These chic banners were ordered for a Wedding Shower-
The black and white glitter is my favorite :)
This sweet cowboy bunting is headed to Texas for a birthday celebration-
I do believe my favorite custom this month was Ella's Birthday Outfit :) SO fun!
This sweet headband was crafted for a recent grad :)
I used it to embellish her wrapped gift in place of a bow. She loved it! :)
I love this sweet little .25 cent dress I made for Miss V*
One too-small onesie {purchased for a quarter from a mom-2-mom sale}
+ some rad black and white fabric {gifted to me from a friend}
= one adorable little playdress!
Can't beat a .25 cent dress! :)
My crafty-to-do-list is SO full! We hope to have our little remodeling project done today so I can be back to sewing for Fall, tomorrow! Yea! :)
SO, what have you been working on?
A Fabulous Pink and Orange 6th Birthday Outfit
7.15.2011
I love my "job" :)
It is seriously fun to design and create fabulous outfits for sweet kids to wear;
especially when the outfits are for extra special occasions, like birthdays!
This sweet outfit is for sweet Miss Ella -
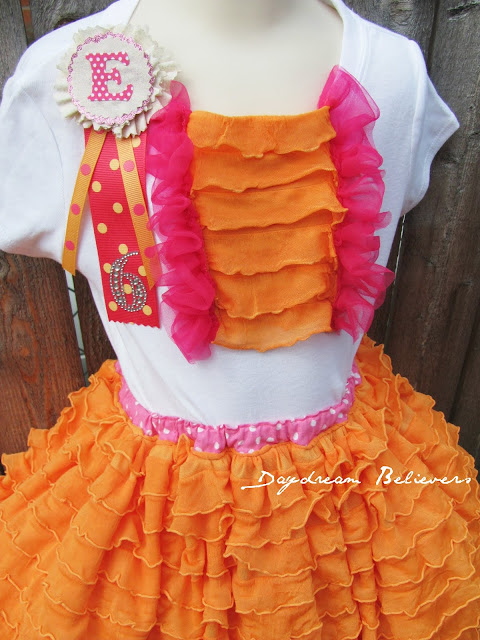
Ella is turning 6 and celebrating with a roller skating birthday party!
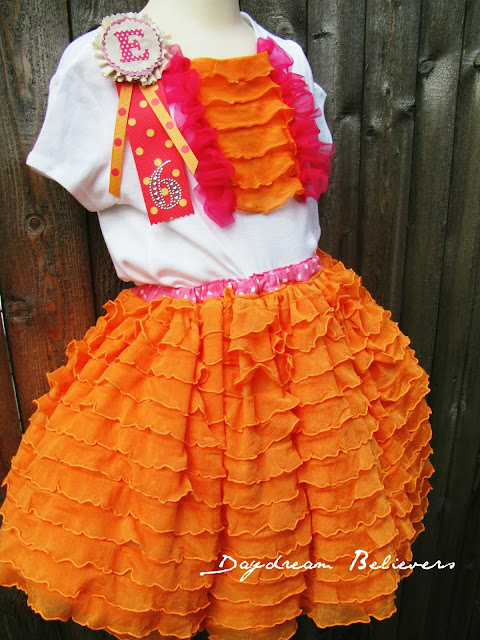
Her mom suggested the bright neon colors, but gave me complete
design control, telling me to "design whatever I would have my own girls wear"
Seriously - that is music to a designer's ears! ;)
It is seriously fun to design and create fabulous outfits for sweet kids to wear;
especially when the outfits are for extra special occasions, like birthdays!
This sweet outfit is for sweet Miss Ella -

Ella is turning 6 and celebrating with a roller skating birthday party!
design control, telling me to "design whatever I would have my own girls wear"
Seriously - that is music to a designer's ears! ;)
The Ultimate Little Girl Party Skirt!
7.08.2011
A few nights ago I had a vision... a super pettiskirt.
It would be the ultimate dress up skirt.
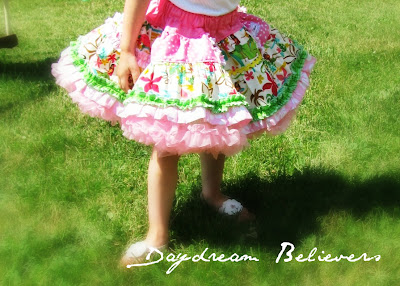
It would be ultra full.
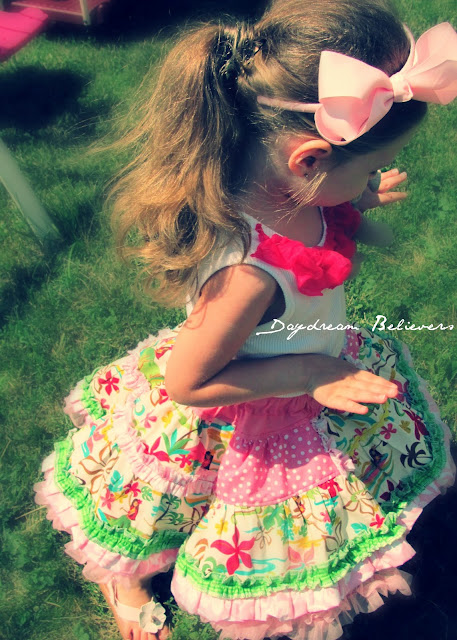
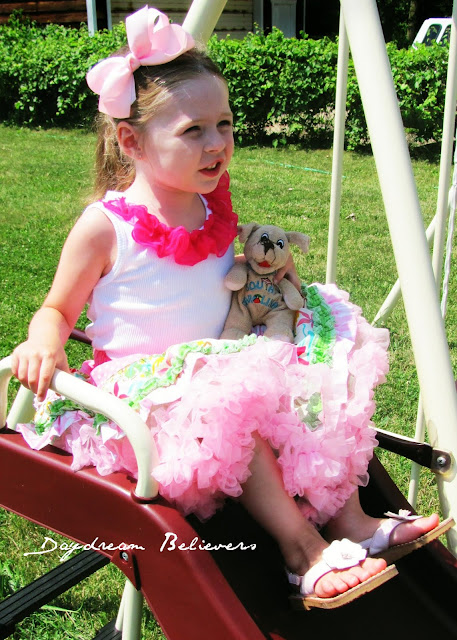
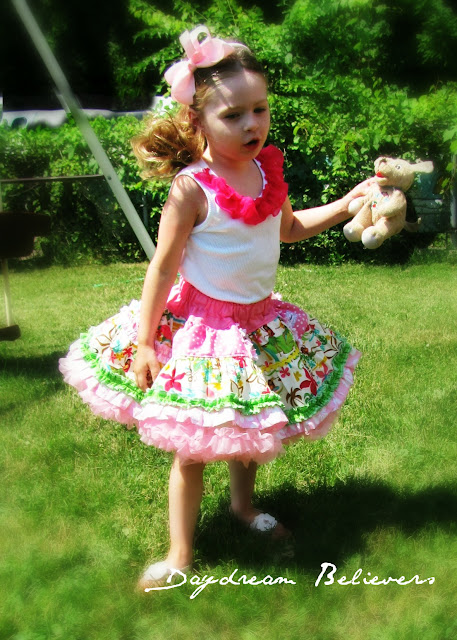
It would feature fabulous fabrics, ruffles, embellishments and lots of chiffon fluff.
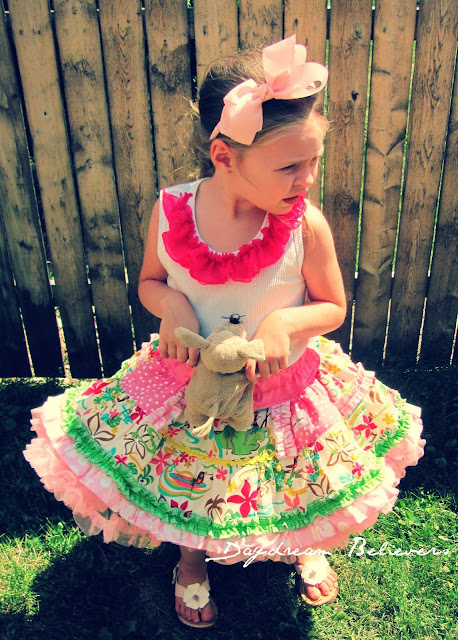
...loads and {LOADS} of chiffon fluff.

It would be lady like and lovely, but comfy and playful too.
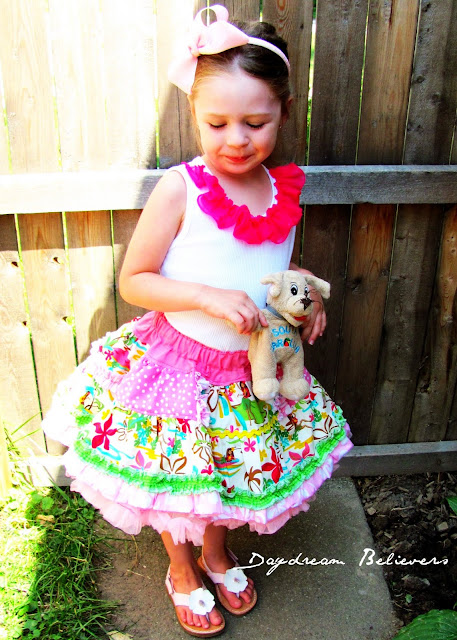

Coming to the Daydream Believer Shop soon! ;)
So much bloggy fun to be excited about!
7.07.2011
What a week! The Ruffle Bloomers Tutorial is rapidly becoming the most-viewed
tutorial I have ever written! {Sweet!} Rarely does my little blog receive so much
attention, it's very exciting! :)
 BIG Thanks to all the AWESOME blogs that have featured the tutorial:
For all you crafty-mummas who have written to say you're trying the tutorial out...
please send me pics of you're creations! I would love to feature your work here
on the blog! :) You can email me or upload pictures of your completed
ruffle-bloomers to the Daydream Believers Facebook Page.
Speaking of the Daydream Believers Facebook Page... yesterday, we reached
(and surpassed) 100 fans! YEA! :) That means it's time for a giveaway! Whoo-hoo! ;)
I'll have details next week!
{In other fun bloggy news to be excited about}
Saturday marked my 1 year blogiversary! :)
To celebrate, I gave the blog a makeover - which I'm totally lovin'!
I also designed a new set of "grab buttons" - help yourself and spread the love!


Have a happy week bloggy friends, ya'll rock my world! :)
tutorial I have ever written! {Sweet!} Rarely does my little blog receive so much
attention, it's very exciting! :)
For all you crafty-mummas who have written to say you're trying the tutorial out...
please send me pics of you're creations! I would love to feature your work here
on the blog! :) You can email me or upload pictures of your completed
ruffle-bloomers to the Daydream Believers Facebook Page.
Speaking of the Daydream Believers Facebook Page... yesterday, we reached
(and surpassed) 100 fans! YEA! :) That means it's time for a giveaway! Whoo-hoo! ;)
I'll have details next week!
{In other fun bloggy news to be excited about}
Saturday marked my 1 year blogiversary! :)
To celebrate, I gave the blog a makeover - which I'm totally lovin'!
I also designed a new set of "grab buttons" - help yourself and spread the love!
Have a happy week bloggy friends, ya'll rock my world! :)
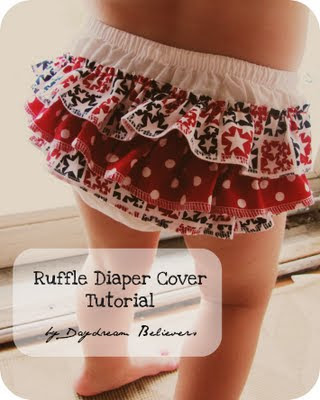
Tutorial: Make a Ruffle Bloomer * Diaper Cover
7.01.2011
Miss V* will be rockin’ a new red, white and blue tutu this weekend and she
was in need of a matching pair of bloomers. Thankfully I had a plain
white cover on hand. I added some festive fabric scraps was able to make her an adorable
ruffle bloomer in less than 30 minutes!
")
Cute, right? This was such an easy (and adorable!) project that I wanted to share the DIY details with you so you can make one too!
You will need:
One Plain Diaper Cover
Three Strips of Fabric (Cut 2 inches wide x 20 inches long)
Sewing Supplies
Here's the scoop:

Finish the edges of each fabric strip.
{Note: For the cover shown here, I finished the edges of each long side using my serger. Alternatively you could finish the edges with a tight zigzag stitch or you could hem each piece with a narrow hem. If hemming, you may wish to increase the width of your strips from 2 inches to 3 inches.}
Ruffle ‘em up! ;)
Sew a gathering stitch along the top edge of each strip. Gather each strip of fabric until it is the same width as the back of your cover. {{Please check out this tutorial for three easy ways to create ruffles}
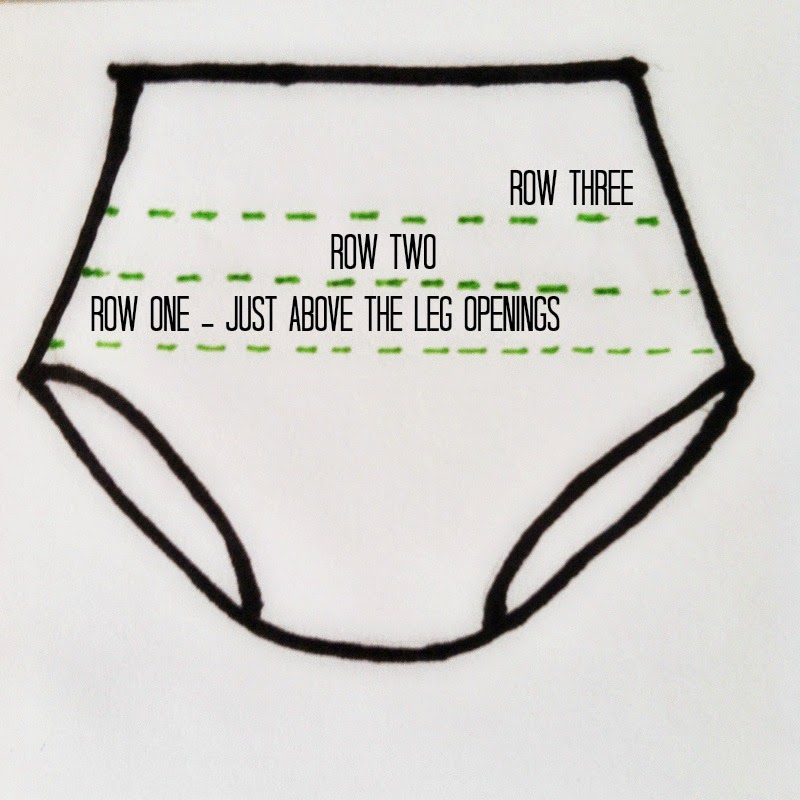
Put it all together...Place and pin your first strip of ruffles across the back of your cover. Be sure to tuck your ends under at the beginning and end of the strip. We are working from the bottom up, so look at the leg opening of your cover, and place your first strip just above this point. Using a straight stitch, sew your ruffle strip onto the cover. Then, position your second strip of ruffles so that the bottom edge of the ruffle sits around the middle of the row beneath it. Pin and sew the strip on to the cover using a straight stitch. Repeat with the third and final strip.
That it friends! Easy peasy and oh so adorable!

Cute, right? This was such an easy (and adorable!) project that I wanted to share the DIY details with you so you can make one too!
You will need:
One Plain Diaper Cover
Three Strips of Fabric (Cut 2 inches wide x 20 inches long)
Sewing Supplies
Here's the scoop:
Finish the edges of each fabric strip.
{Note: For the cover shown here, I finished the edges of each long side using my serger. Alternatively you could finish the edges with a tight zigzag stitch or you could hem each piece with a narrow hem. If hemming, you may wish to increase the width of your strips from 2 inches to 3 inches.}
Ruffle ‘em up! ;)
Sew a gathering stitch along the top edge of each strip. Gather each strip of fabric until it is the same width as the back of your cover. {{Please check out this tutorial for three easy ways to create ruffles}
Put it all together...Place and pin your first strip of ruffles across the back of your cover. Be sure to tuck your ends under at the beginning and end of the strip. We are working from the bottom up, so look at the leg opening of your cover, and place your first strip just above this point. Using a straight stitch, sew your ruffle strip onto the cover. Then, position your second strip of ruffles so that the bottom edge of the ruffle sits around the middle of the row beneath it. Pin and sew the strip on to the cover using a straight stitch. Repeat with the third and final strip.
That it friends! Easy peasy and oh so adorable!
Subscribe to:
Posts (Atom)
